The Ultimate Guide to Sound Deadening Your Vehicle: A Comprehensive Step-by-Step Approach

Introduction: The Quiet Revolution on Wheels
In the ever-evolving world of automotive advancements, the importance of sound deadening in vehicles has emerged as a pivotal aspect of enhancing driving comfort and experience. This need for tranquility on the road has led to a quiet revolution, one where the cacophony of engine noise, road hum, and external chaos is masterfully subdued, paving the way for a serene driving experience.
Welcome to the World of B-Quiet Sound Deadening Solutions
Enter B-Quiet Sound Deadening, a solution crafted for those who value peace and quiet while navigating the bustling roads. At B-Quiet, we recognize that a vehicle is more than just a conveyance; it is a personal haven, a space where the journey matters as much as the destination.
Our range of sound deadening products is designed to significantly reduce unwanted noise, transforming your vehicle into a sanctuary of silence. With a focus on using cutting-edge materials and innovative designs, B-Quiet products act as an auditory shield, ensuring that the only sounds you hear are the ones you choose.
The Multifaceted Benefits of Sound Deadening
Sound deadening transcends beyond merely quelling the noise. It is about refining the entire driving experience, enhancing the clarity of your car's audio system, and preserving the quality of in-car conversations.
The benefits are multi-dimensional:
Comfort: Reducing noise pollution transforms long drives into more enjoyable journeys, significantly decreasing auditory fatigue.
Improved Audio Quality: Experience your music and conversations with unmatched clarity, as sound deadening allows every note and word to be heard crisply, free from the interference of external noise.
Increased Vehicle Value: A quieter cabin is often synonymous with luxury and quality. By soundproofing your vehicle with B-Quiet products, you're not just investing in comfort but also elevating your vehicle's market value.
A Comprehensive Guide to Sound Deadening
Our guide, backed by years of expertise in sound deadening, delves deep into the science and art of creating a tranquil vehicle interior.
From understanding the basics of sound propagation in a vehicle to the intricacies of installation, this guide is a testament to our commitment to offering a quieter, more enjoyable driving experience.
Whether you are a hands-on DIY enthusiast or seeking knowledge before consulting professionals, this guide is your comprehensive resource for all things related to sound deadening.
As we embark on this journey towards automotive tranquility, let the innovation and effectiveness of B-Quiet Sound Deadening lead the way. Welcome to a world where the road's roar is muted, and the joy of driving in peace is amplified.

Table of Content:
1: Understanding Sound Deadening
- 1.1: What is Sound Deadening?
- 1.2: The Science of Noise in Your Vehicle
- 1.3: Identifying Noise Sources
- 1.4: Types of Sound Deadening Materials
- 1.5: How Sound Deadening Improves Your Driving Experience
2: Preparing for Sound Deadening Installation
- 2.1: Tools and Materials You Will Need
- 2.2: Safety Precautions and Best Practices
- 2.3: Vehicle Preparation – Cleaning and Disassembly
3: Installation of Sound Deadening Materials
- 3.1: Step-by-Step Installation Guide
- 3.1.1: Door Panels
- 3.1.2: Floor and Ceiling
- 3.1.3: Trunk Area
- 3.1.4: Wheel Wells and Fenders
- 3.2: Tips for a Smooth Installation
- 3.3: Troubleshooting Common Issues During Installation
4: Advanced Sound Deadening Techniques
- 4.1: Using Damping Materials for Optimal Results
- 4.2: Creating Barriers and Absorbers
- 4.3: Addressing Specific Frequencies and Resonances
- 4.4: Combining B-Quiet Products for Maximum Effectiveness
5: Finishing Touches and Post-Installation
- 5.1: Sealing and Reassembly
- 5.2: Sound Testing After Installation
- 5.3: Maintenance of Sound Deadening Materials
6: Professional vs. DIY Sound Deadening
- 6.1: When to Call in the Professionals
- 6.2: Benefits of DIY Sound Deadening
- 6.3: Cost Analysis
7: Case Studies and Success Stories
- 7.1: Before and After – Highlighting the Difference
- 7.2: Customer Testimonials and Professional Endorsements
- 7.3: Gallery of B-Quiet Sound Deadening Transformations
1: Understanding Sound Deadening
1.1: What is Sound Deadening?
Sound deadening is the process of reducing or eliminating unwanted sound within your vehicle.
It's a form of acoustic treatment that targets the reduction of noise pollution—a term that encompasses the various types of sounds that can invade your vehicle’s interior, from the hum of the engine to the hiss of the wind and the drone of the tires against asphalt.
By using specialized materials and techniques, sound deadening minimizes the vibrations that transmit noise, creating a more silent and pleasant cabin environment.
| According to Wikipedia Soundproofing is any means of impeding sound propagation. |
1.2: The Science of Noise in Your Vehicle
Noise in your vehicle arises from vibrations, which are generated by different components and surfaces as they interact with one another and the external environment.
These vibrations travel through the air and the vehicle's structure as sound waves. When these waves reach your ears, they're interpreted as noise. Sound deadening works to disrupt this process in three key ways: absorption, damping, and barrier creation.
Absorptive materials catch sound waves and convert them into heat, damping materials reduce the vibrational energy, and barriers reflect the sound waves, preventing them from entering the cabin.
1.3: Identifying Noise Sources
To effectively soundproof your vehicle, it's important to first identify where the noise is coming from. Common noise sources include:
- Engine noise, which can dominate the cabin, especially at high speeds or under acceleration.
- Road noise, caused by tire contact and vibrations transmitted through the car’s suspension and chassis.
- Wind noise, which increases with speed due to air turbulence around the vehicle's body.
- Component noise, such as rattles or squeaks from loose interior trim or mechanical components.
- Sound deadening targets these noise sources with strategic material placement and comprehensive coverage to dampen and block unwanted sounds.
1.4: Types of Sound Deadening Materials
There are a variety of materials used for sound deadening, each with a specific function:
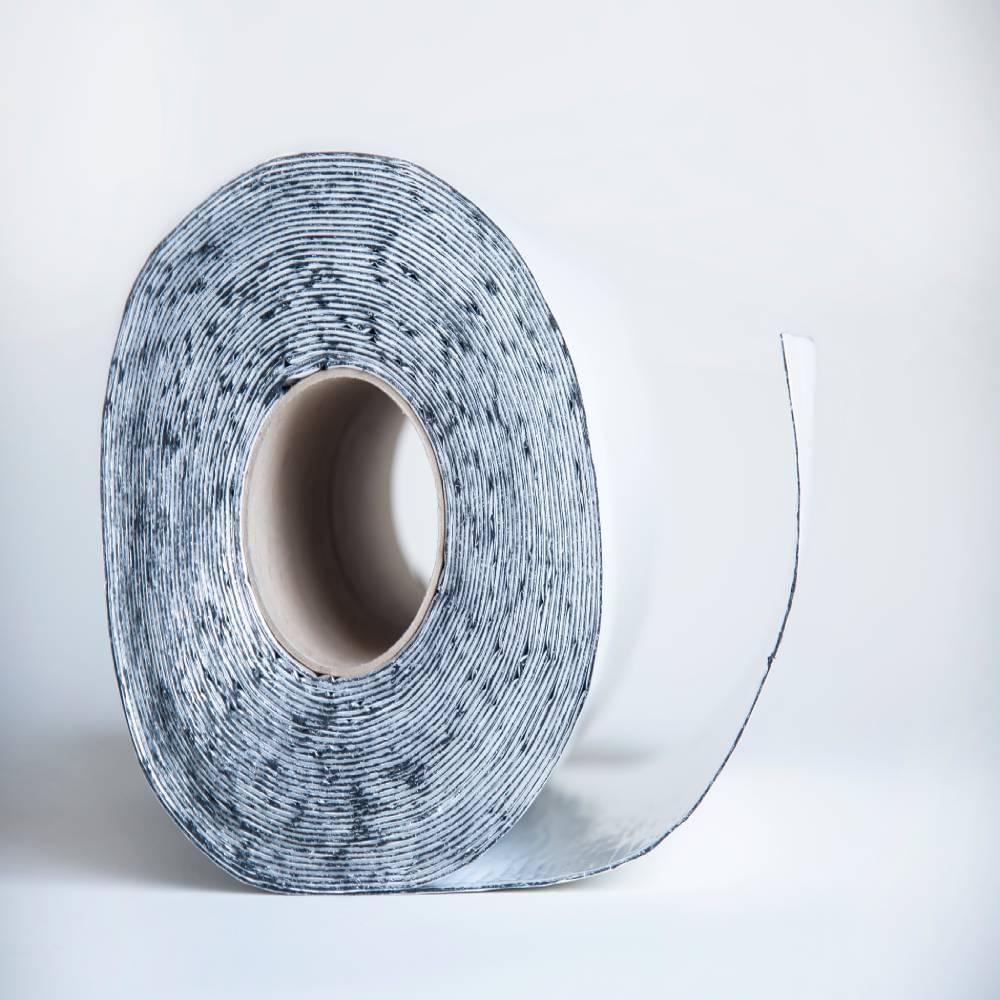
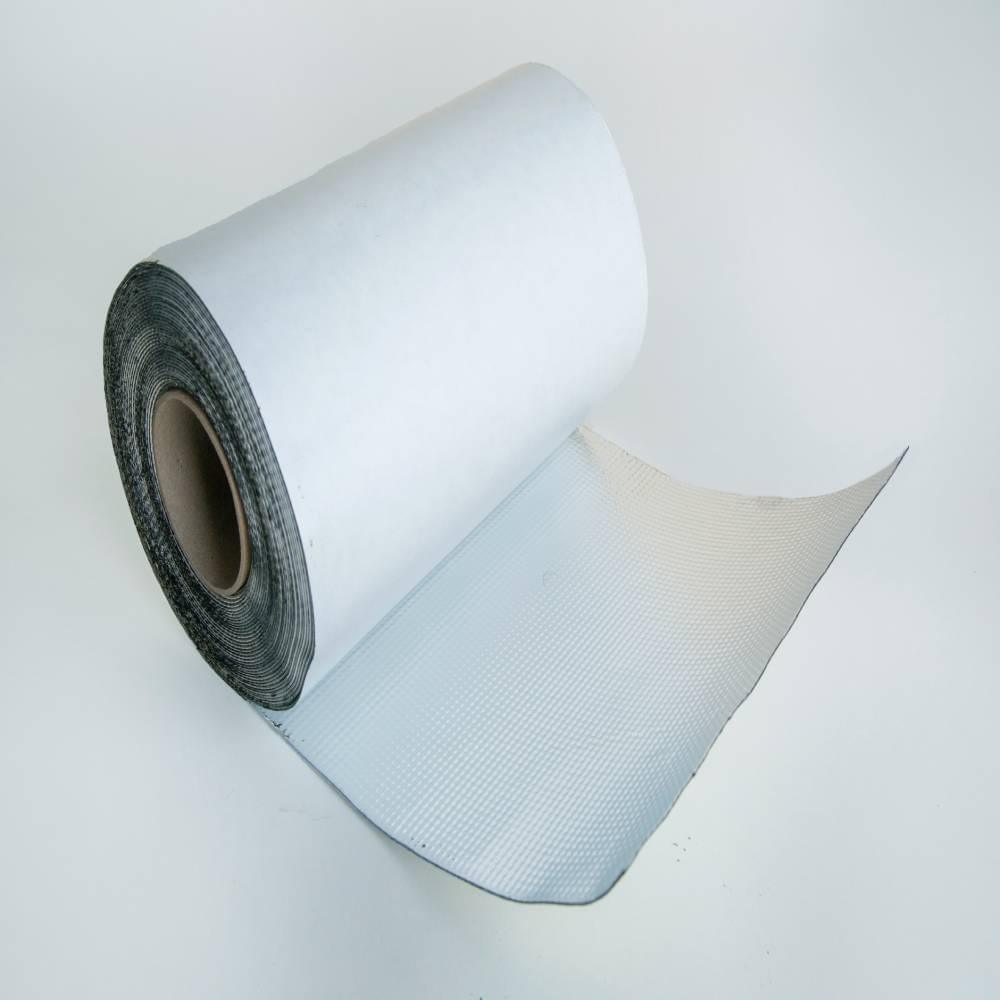
- Damping mats: Typically made of butyl rubber, they are adhered to metal panels to damp vibrations.
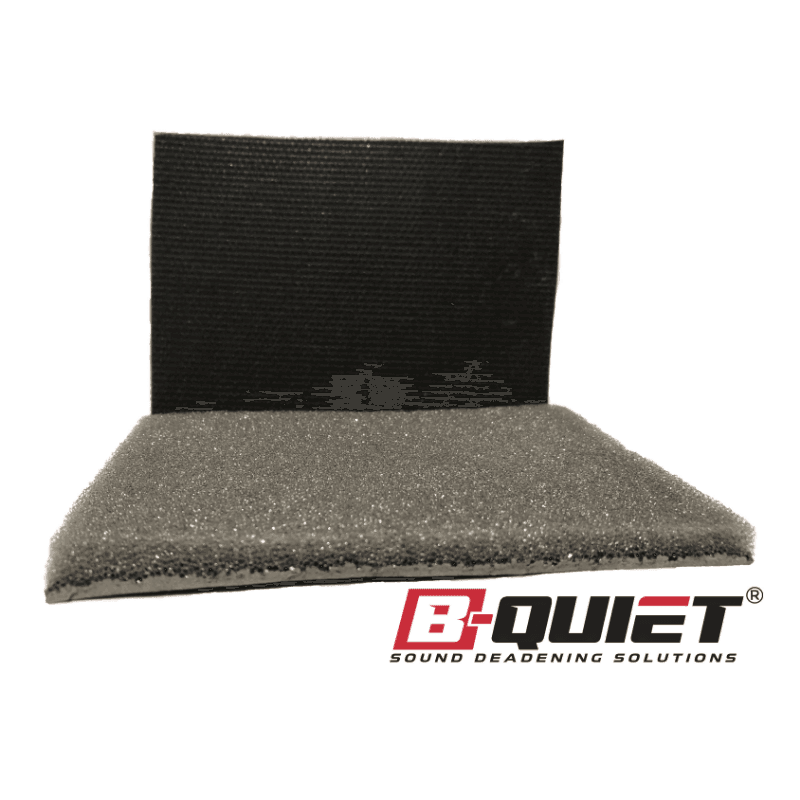
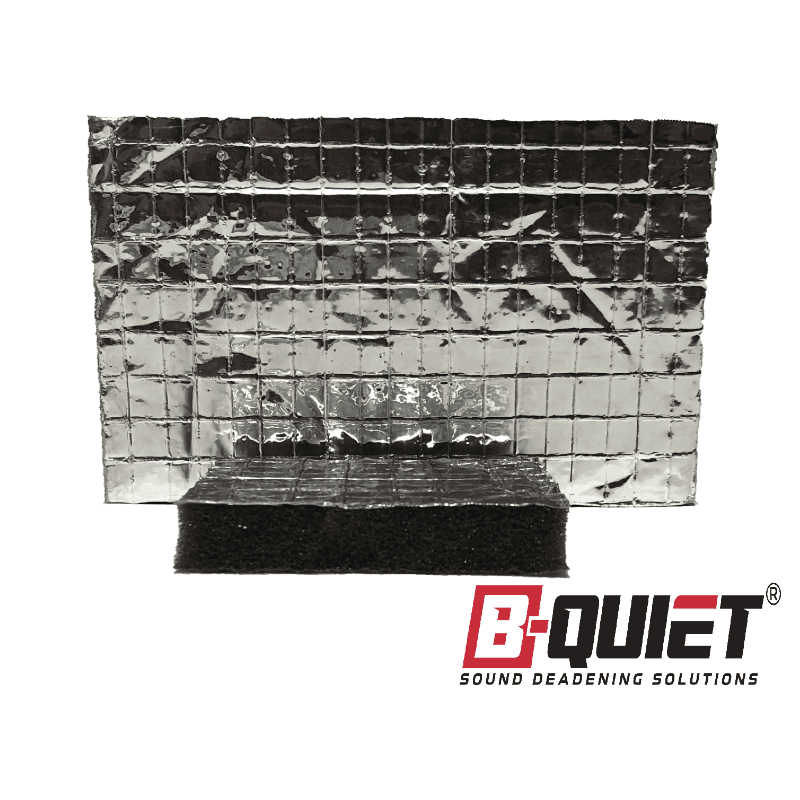
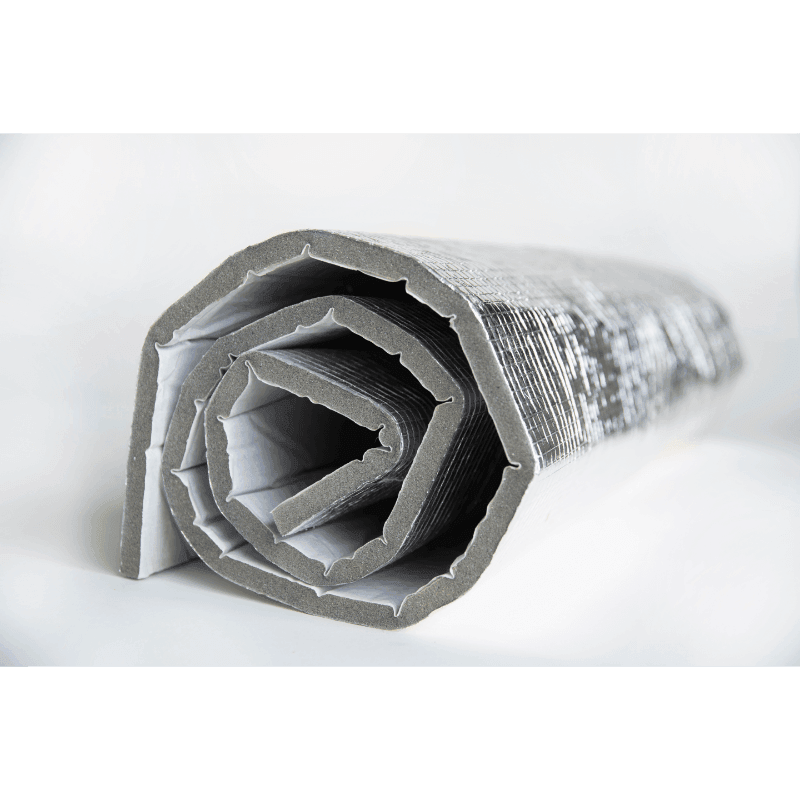
- Foams: Open-cell foams absorb airborne noise, while closed-cell foams can also act as thermal insulation.
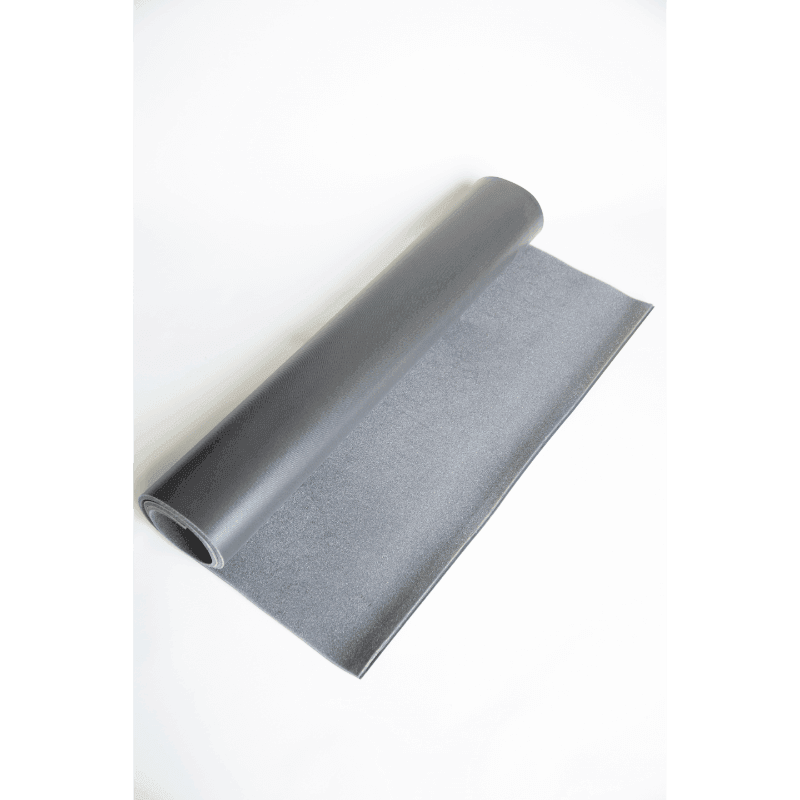
- Mass-loaded vinyl (MLV): A heavy, yet flexible, material that serves as a sound barrier.
- Insulation liners: Often used under carpets or within door panels to absorb and block sound.


1.5: How Sound Deadening Improves Your Driving Experience
By mitigating noise pollution, sound deadening dramatically enhances your driving experience. Here's how:
- Comfort: A quieter cabin reduces auditory fatigue, making long trips more pleasant.
- Concentration: Reduced noise levels mean fewer distractions, allowing you to focus better on driving.
- Communication: It's easier to have conversations or enjoy hands-free calls without raising your voice.
- Audio Quality: Music and spoken words from your stereo system are crisper and clearer without the interference of background noise.
- Vehicle Value: Soundproofing is a mark of quality that can increase the resale value of your vehicle.
- Stress Reduction: A quieter environment inside your vehicle can help lower stress and improve overall mood while driving.
B-Quiet’s range of sound deadening products is designed to deliver these benefits, ensuring every journey is as enjoyable and comfortable as possible.
|
Did You Know - Sound Deadener and Sound Quality: Did you know that the right sound deadener can drastically enhance the sound quality inside your vehicle? By reducing the internal reverberations and echoes, a quality sound deadener not only dampens unwanted noise but also enriches the audio experience. Whether it's your favorite song or an important phone call, the clarity brought by effective sound deadening is unparalleled. |

2: Preparing for Sound Deadening Installation
Before diving into the actual installation of sound deadening materials, it's critical to prepare thoroughly. This preparation ensures a safe and efficient process, and lays the groundwork for optimal sound deadening performance.
2.1: Tools and Materials You Will Need
To start your sound deadening project, you will need the following tools and materials:
- B-Quiet Sound Deadening Products: Choose from our range based on your vehicle's needs.
- Roller Tool: Essential for applying sound deadening mats, ensuring they adhere properly to vehicle surfaces.
- Utility Knife or Scissors: For cutting sound deadening materials to size.
- Rubber Gloves: To protect your hands from adhesives and insulation materials.
- Cleaning Supplies: Such as isopropyl alcohol, rags, and a cleaner/degreaser to prep surfaces.
- Screwdrivers and Wrench Set: For removing panels and components.
- Torx Drivers: If your vehicle uses Torx screws.
- Panel Removal Tools: Plastic pry tools that can help you remove panels without damaging them.
- Wire Terminal Removal Tool: Useful for disconnecting electrical connectors safely.
- Masking Tape: To label connectors and wires, ensuring easy reassembly.
- Measuring Tape or Ruler: For precise measurement of material cuts.
Having all of these tools and materials ready before you begin will streamline the installation process.
2.2: Safety Precautions and Best Practices
Safety is paramount when working on your vehicle. Follow these guidelines:
- Work in a Well-Ventilated Area: Adequate ventilation is important when handling adhesive materials.
- Wear Protective Gear: Always use gloves to protect your hands, and consider wearing a mask if you're sensitive to chemical fumes or dust.
- Disconnect the Battery: Before removing any interior components, particularly those related to the electrical system, disconnect the car battery.
- Handle Tools with Care: Be cautious with sharp tools to avoid injury or damage to your vehicle.
- Stay Organized: Keep tools and parts organized to prevent loss and ensure a smooth reassembly process.
- Take Your Time: Never rush the job. Taking your time ensures the best results and keeps you safe.
2.3: Vehicle Preparation – Cleaning and Disassembly
Proper vehicle preparation is crucial for the success of sound deadening installation:
- Clear the Workspace: Remove all personal items from your vehicle.
- Remove Seats and Interior Panels: Depending on where you're applying the material, you may need to remove seats, carpet, door panels, and trim.
- Clean Surfaces Thoroughly: Use a degreaser followed by isopropyl alcohol on the surfaces where you'll be applying sound deadening. This ensures optimal adhesion.
- Document the Process: Take pictures before and during disassembly to aid in reassembly.
- Label Everything: Use masking tape and a marker to label wires, connectors, and screws. This will save time and confusion when putting everything back together.
Once your vehicle is prepared, you're ready to move on to the installation process with confidence, knowing that your workspace and vehicle are ready for the B-Quiet sound deadening transformation.
| Did You Know - Acoustic Foam and Airborne Sound Waves: Did you know acoustic foam plays a vital role in controlling airborne sound waves in your car? This innovative material is designed to absorb sound waves, significantly reducing noise levels inside the cabin. It’s an essential component of any sound deadening kit, ensuring your drives are peaceful, no matter the chaos outside. |
3: Installation of Sound Deadening Materials
Installing sound deadening materials can transform the driving experience by creating a quieter, more peaceful cabin. Here’s how to approach the installation in various areas of your vehicle.
3.1: Step-by-Step Installation Guide
This guide will take you through the process, from the doors to the trunk, ensuring a thorough application of B-Quiet products.
3.1.1: Door Panels
- Remove the door panel: Use your panel removal tools to gently pry off the door panel.
- Clean the surface: Wipe down the metal with a cleaner to remove grease and dirt.
- Measure and cut: Measure the door panel and cut the B-Quiet material to size.
- Apply the material: Peel the backing off and apply the sound deadening mat, using the roller to smooth out any air bubbles and ensure firm adhesion.
- Reassemble: Once the material is in place, carefully replace the door panel.
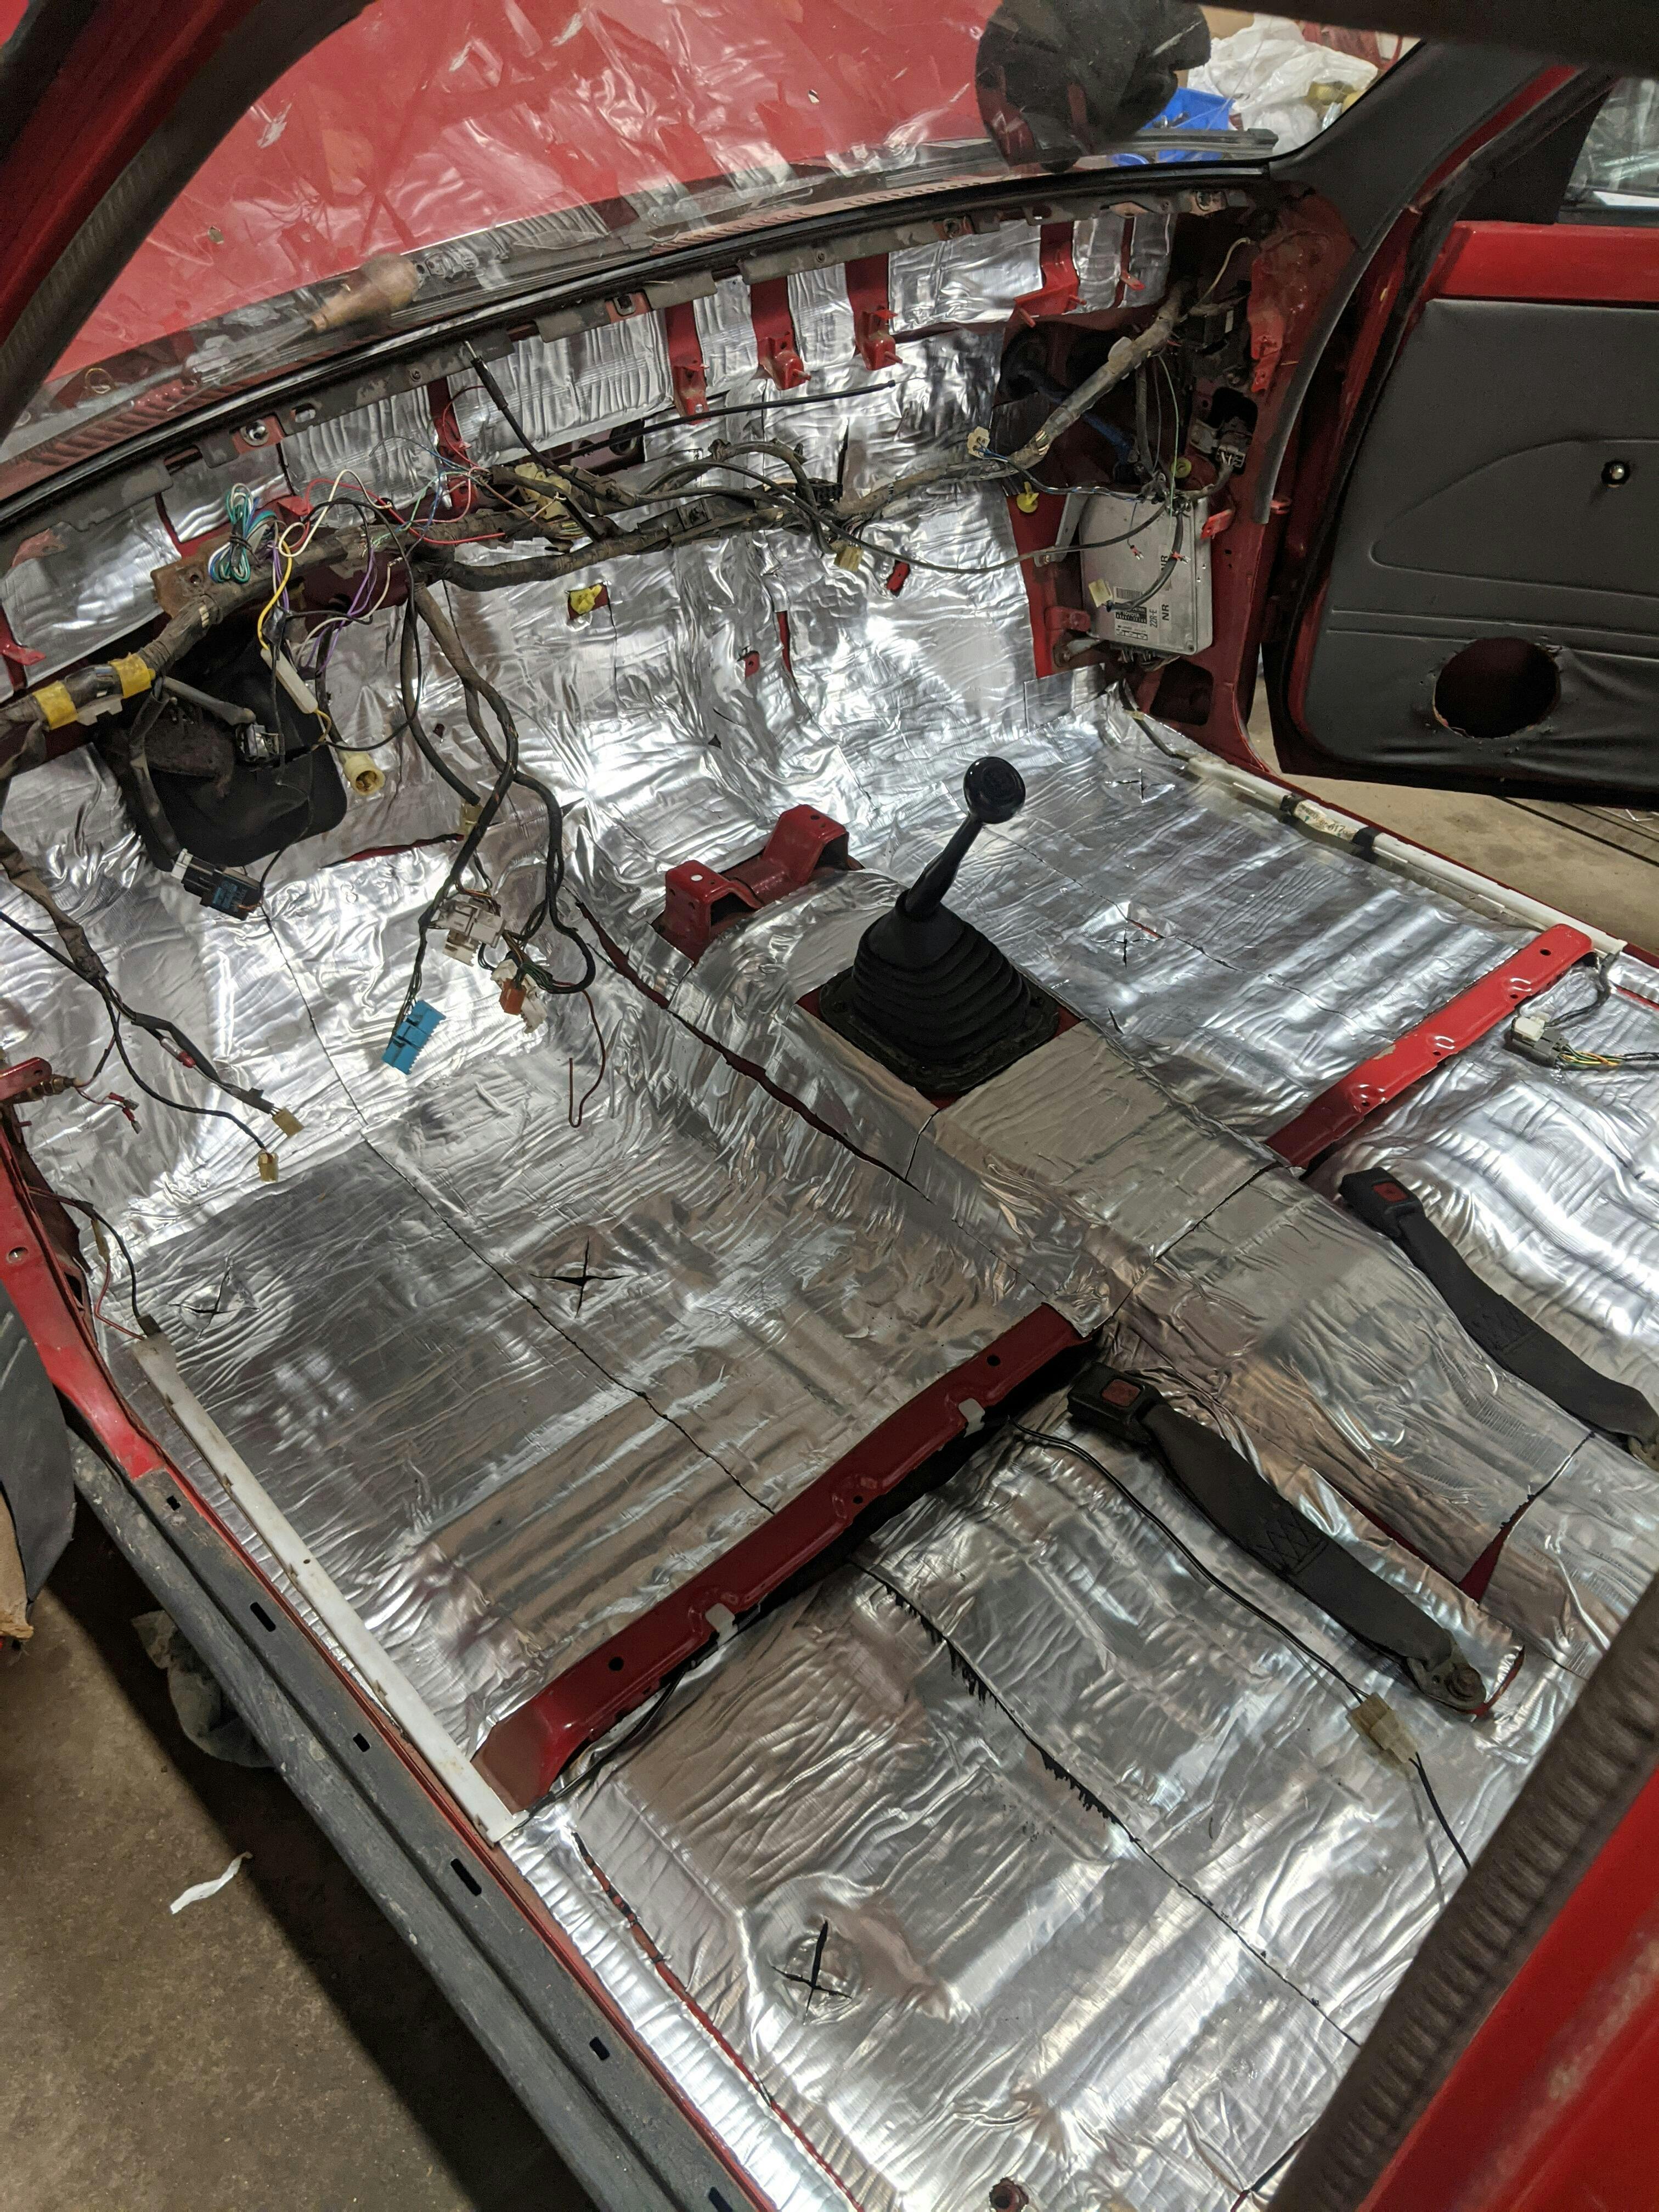
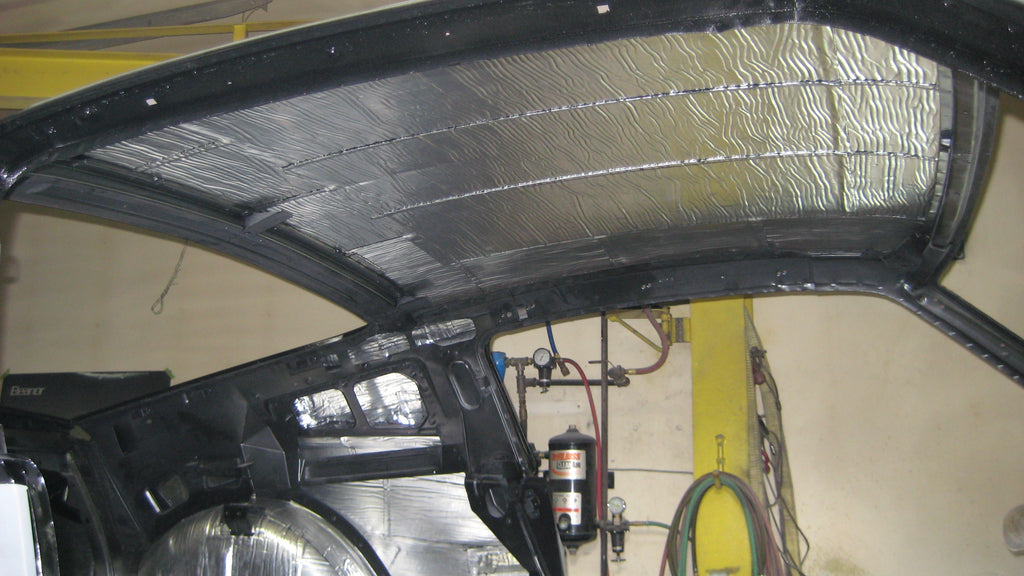
3.1.2: Floor and Ceiling
- Strip the interior: Remove seats, carpeting, and headliner, following safety guidelines for disconnection of electrical components.
- Clean and prep: Clean all surfaces similarly to the door panel process.
- Measure, cut, and apply: Cut the B-Quiet material to fit the floor and ceiling, applying with attention to contours and corners for a snug fit.
- Insulate: Consider adding an additional layer of B-Quiet VComp or LComp for thermal insulation.
- Replace: Reinstall the carpeting, seats, and headliner once the material is firmly in place.
3.1.3: Trunk Area
- Empty the trunk: Remove any liners, side panels, and the spare tire if necessary.
- Clean the surface: Thoroughly clean all metal surfaces.
- Apply sound deadening: Cut and apply the B-Quiet material to the trunk floor, side walls, and beneath the rear deck if accessible.
- Check the fit: Ensure no material interferes with the spare tire, tools, or reinstallation of panels.
3.1.4: Wheel Wells and Fenders
- Access the area: Remove wheels and inner fender liners if necessary.
- Clean thoroughly: Make sure to remove all mud and debris.
- Apply the material: Attach the B-Quiet material, working around the complex shapes of the wheel wells and fenders.
- Reassemble: Put the fender liners and wheels back in place, ensuring no loose material can interfere with the vehicle's operation.
3.2: Tips for a Smooth Installation
- Temperature Matters: Install the B-Quiet material in a warm environment to ensure the best adhesion.
- Overlapping: Overlap sheets by about an inch to ensure there are no gaps for sound to travel through.
- Use the Right Pressure: Applying even pressure with the roller will ensure the material adheres properly without any bubbles or wrinkles.
3.3: Troubleshooting Common Issues During Installation
- Material not sticking: If the material isn’t sticking properly, check the temperature and cleanliness of the application surface. Re-clean if necessary and use a heat gun to warm the adhesive.
- Air bubbles: If bubbles form, use the roller to work them to the edges. If that doesn’t work, a small incision can allow the air to escape.
- Misalignment: If a piece is misaligned, carefully lift it (if the adhesive allows) and reapply. For B-Quiet materials that have a very strong adhesive, it's important to place it correctly the first time.
- Material too stiff: If the material is too stiff to conform to complex shapes, gently heat it with a heat gun to increase flexibility.
| Did You Know - Sound Deadening Mats and Engine Compartments: Did you know that sound deadening mats are not just for the cabin but can be extremely effective in engine compartments too? These mats, when strategically placed, can make a huge difference in reducing the engine noise that permeates into your vehicle's interior, offering a quieter and more enjoyable driving experience. |
4: Advanced Sound Deadening Techniques
After covering the basics of installation, this moves into more sophisticated strategies for enthusiasts looking to take their sound deadening to the next level.
4.1: Using Damping Materials for Optimal Results
Damping materials are the first line of defense against vibrations that create noise in your vehicle. To use these materials effectively:
- Strategic Placement: Focus on areas that are prone to vibration, such as door skins, roof, and floor panels.
- Layering: Apply a layer of B-Quiet Extreme followed by a layer of B-Quiet VComp for both vibration damping and airborne noise reduction.
- Coverage: Aim for as close to 100% coverage as is practical, especially in areas with complex geometry where vibrations can be amplified.
4.2: Creating Barriers and Absorbers
Sound barriers and absorbers work by blocking noise and soaking up sound waves, respectively.
- Mass-Loaded Vinyl (MLV): Use B-Quiet’s MLV barriers in spaces where sound transmission is highest, such as the firewall and floor.
- Foam Layers: Apply B-Quiet’s absorptive foams under carpets and inside door panels to absorb higher frequency noises.
- Sealing Gaps: Ensure all gaps and crevices are sealed, as these can be channels for noise to enter the cabin.
4.3: Addressing Specific Frequencies and Resonances
Every vehicle has its own acoustic signature, with specific problem frequencies and resonances.
- Diagnosing Problem Areas: Use a spectrum analyzer app or tool to identify your vehicle's specific noise issues.
- Targeted Damping: Apply damping materials to areas that correspond with problem frequencies. For instance, thicker materials are generally better for damping lower frequencies.
- Decoupling: For resonant areas, consider decoupling surfaces using foam gaskets or spacers to prevent vibration transfer.
4.4: Combining B-Quiet Products for Maximum Effectiveness
For the ultimate in sound deadening, combine different B-Quiet products.
- Composite Approach: Use a combination of B-Quiet Extreme, VComp, and HLiner to address a full spectrum of sound frequencies and sources.
- Double Layering: In extreme cases, such as competition vehicles or particularly noisy environments, double layering of B-Quiet products can provide additional dB reduction.
- Custom Solutions: Don’t hesitate to cut and shape B-Quiet materials to create custom solutions for areas like wheel arches or behind speakers for improved audio fidelity.
5: Finishing Touches and Post-Installation
Completing a sound deadening project is about more than just installing the materials. This covers the final steps to ensure that the installation is not only effective but also lasting.
5.1: Sealing and Reassembly
Once the sound deadening material is in place, it's important to seal everything up properly to maximize its effectiveness.
- Check the Seals: Go over every area where B-Quiet products were applied and make sure edges are firmly pressed down and sealed.
- Reinstall Interior Components: Carefully replace any interior components, panels, and trim pieces removed during the installation process.
- Sealant Application: In some cases, you might want to apply an additional sealant around the edges of the sound deadening material, especially in areas exposed to moisture.
- Final Inspection: Do a thorough check to make sure nothing has been overlooked and that all parts are reassembled correctly.
5.2: Sound Testing After Installation
Testing the sound levels after installation can help you assess the effectiveness of your work.
- Use a Decibel Meter: Conduct a sound level test with the same conditions before and after the installation to measure the reduction in noise.
- Road Test: Take the vehicle for a drive on different types of surfaces to test for noise reduction under various conditions.
- Refinement: If there are still areas where noise is higher than expected, it might be necessary to revisit those spots and add more sound deadening material.
5.3: Maintenance of Sound Deadening Materials
Maintaining the sound deadening material will ensure its longevity and continued effectiveness.
- Regular Checks: Inspect the areas where sound deadening materials were applied periodically, especially after exposure to extreme conditions.
- Cleaning: Keep the interior of your vehicle clean, as debris can compromise the integrity of sound deadening materials over time.
- Avoid Moisture: Watch for signs of moisture buildup that can lead to mold or corrosion under the material. Address any leaks or condensation issues promptly.
- Warranty and Support: Utilize B-Quiet's warranty and customer support for any concerns about the product's performance over time.
| Did You Know - Sound Dampening Materials and Sound Insulation: Did you know that sound dampening materials are key to superior sound insulation in vehicles? These materials work by muffling the external noise, resulting in a significant reduction of exterior noise intrusion. This sound insulation is crucial for maintaining a calm and distraction-free environment inside your car. |
6: Professional vs. DIY Sound Deadening
Deciding between a professional installation and a do-it-yourself approach is crucial depending on your level of expertise, the complexity of the job, and budget considerations. This compares both options.
6.1: When to Call in the Professionals
Sometimes the scope of the sound deadening project or the specific needs of your vehicle may necessitate professional help.
- Complex Vehicles: Some vehicles, especially luxury or exotic cars, may require the expertise of a professional due to their intricate design.
- Comprehensive Coverage: Professionals can ensure complete coverage, even in hard-to-reach areas, and are more likely to guarantee their work.
- Time Constraints: If you’re short on time, a professional can complete the job quickly and efficiently.
- Tools and Experience: Professionals have access to specialized tools and experience that can be crucial for optimal results.
6.2: Benefits of DIY Sound Deadening
For those who are handy and prefer a hands-on approach, DIY sound deadening can be a rewarding project.
- Cost Savings: The most obvious benefit of DIY is the potential savings on labor costs.
- Personal Satisfaction: There's a sense of accomplishment that comes with completing the project on your own.
- Customization: A DIY approach allows for custom solutions tailored exactly to your needs and preferences.
- Knowledge Gain: You’ll learn a lot about your vehicle and sound deadening techniques, which is valuable knowledge for any car enthusiast.
6.3: Cost Analysis
It's important to break down the costs associated with both professional and DIY sound deadening to make an informed decision.
- Material Costs: The price of sound deadening materials is the same whether you DIY or go professional, but this will be your only significant expense if you choose the DIY route.
- Labor Costs: Professional installation can double or triple the overall cost, depending on the rates and the complexity of the installation.
- Tool Investment: If you’re starting from scratch, you may need to purchase special tools for DIY installation, which can add to the initial cost but can be considered a long-term investment.
- Time Investment: Your time is valuable. Consider the amount of time you’ll need to invest in a DIY project and what that’s worth to you.
| Did You Know - Sound Control and Exterior Noise: Did you know that effective sound control within your vehicle can dramatically alter your experience by shielding you from exterior noise? This transformation is achieved through a combination of sound deadening mats, acoustic foam, and other specialized materials, all included in a comprehensive sound deadening kit. The result is an oasis of quiet, making every journey more enjoyable. |
Conclusion: Mastering the Quiet Ride with B-Quiet
As we reach the end of our comprehensive guide to sound deadening, it’s clear that the journey from a noisy cabin to a serene driving experience is both an art and a science. We’ve explored the intricate details of sound deadening, from understanding the basics to the meticulous process of installation, and even the nuanced choices between DIY and professional applications.
Quality Matters
Your vehicle is more than just a means of transportation; it's a mobile sanctuary where comfort should not be compromised by the intrusion of unwanted noise. This is where the choice of high-caliber materials comes into play, and why B-Quiet stands out in the sound deadening space. The importance of selecting the right products cannot be overstated, as it’s the foundation upon which a peaceful driving experience is built.
Take the Step
Armed with this guide, you're now equipped with the knowledge to embark on your sound-deadening project with confidence. Whether you're a car enthusiast looking to enhance your ride, or simply seeking a quieter commute, the path has been laid out for you to follow.
Innovation at the Forefront
Finally, we look to the horizon of automotive sound deadening. B-Quiet continues to innovate, pushing the boundaries of technology and product effectiveness. The evolution of sound deadening materials and techniques is driven by the pursuit of silence on the road, and B-Quiet is at the forefront of this journey.
In the quietude of your newly soundproofed vehicle, every drive can be a serene escape. Let the world outside fade away as you enjoy the comfort, improved audio quality, and heightened value of your vehicle. Trust in B-Quiet’s expertise and commitment to excellence to guide you to a future where the only noise that matters is the one you choose to hear.
Your next ride could be the quietest one yet. Embrace the silence. Embrace B-Quiet. Take the First Step Towards a Quieter Ride Today
Explore Our Products
Dive into the world of serene drives and impeccable audio with B-Quiet’s extensive range of sound deadening solutions. We invite you to explore our product lineup, which has been engineered to meet the needs of every vehicle and soundproofing project. Whether you're looking to tackle a full-scale installation or just starting with the basics, our catalog has everything you need. Visit our website and discover how B-Quiet can transform your driving experience.
Share Your Story
Have you already embarked on your journey to a quieter vehicle with B-Quiet? We are eager to hear about your adventures in soundproofing. Your stories inspire us and help others see the transformative power of quality sound deadening. Share your before-and-after experiences, the challenges you've overcome, and the peaceful rides you now enjoy. Connect with us on social media and join the B-Quiet community of satisfied drivers and enthusiasts. Share your photos at service@b-quiet.com
Get Personalized Advice
Every vehicle and soundproofing project is unique, and sometimes you need a guiding hand. If you're looking for personalized advice, our team of sound deadening experts is here to help. Reach out to us with your questions, and we’ll provide tailored recommendations to ensure you get the best results from your sound deadening efforts. Contact us via email, phone, or our website form, and we’ll partner with you to achieve the silence you deserve.
Embrace the B-Quiet Difference
Your peaceful driving experience is just a click away. Don’t let another noisy mile pass you by. Choose B-Quiet and transform your vehicle into the oasis of tranquility you’ve always wanted it to be.
Join us, quiet the noise, and let the world fade away. Start your B-Quiet journey today!
Appendix
The world of sound deadening is full of specialized terms and questions. Here’s a helpful appendix to clarify terminology, answer common queries, and direct you to further resources.
A.1: Glossary of Sound Deadening Terms
- Absorption: The process by which sound deadening materials convert sound energy into heat, reducing noise.
- Acoustic Sealant: A pliable, soundproofing sealant used to fill gaps and seams to prevent sound leaks.
- Damping: The reduction of vibrational energy, which in turn reduces sound transmission.
- Decibel (dB): A unit of measurement for sound intensity or loudness.
- Mass-Loaded Vinyl (MLV): A soundproofing material made from vinyl and loaded with barium sulfate or other materials to add mass, which blocks sound.
- Noise Reduction Coefficient (NRC): A scalar representation of the amount of sound energy absorbed upon striking a particular surface.
- Resonance: The amplification of sound in a particular structure due to the structure's vibrational frequency matching the frequency of the sound waves.
- Sound Transmission Class (STC): A rating of how well a building or material reduces airborne sound.
- Vibration: The mechanical oscillations of an object, which can be a source of noise in a vehicle.
A.2: Frequently Asked Questions
- What areas of my vehicle should I prioritize for sound deadening?
- Focus on areas where noise is most intrusive, such as doors, floor, roof, and wheel wells.
- Can I install sound deadening materials myself?
- Yes, with the right tools and guidance, many vehicle owners successfully install sound deadening materials themselves.
- How much material will I need for my vehicle?
- It depends on the vehicle size and how much coverage you desire. A standard small car may need approximately 50-70 square feet for full coverage.
- Does sound deadening material add a lot of weight to my vehicle?
- While there is some weight addition, it is generally minimal compared to the vehicle's total weight and well worth the benefits.
- Can sound deadening improve my car’s audio system quality?
- Absolutely, sound deadening reduces background noise, allowing you to hear your audio system more clearly.
A.3: Resource List for Further Reading
For those who wish to delve deeper into the world of sound deadening, the following resources offer a wealth of information:
- "Sound Deadening 101" by B-Quiet: An in-depth look at the basics of sound deadening, available on our website.
- "Automotive Soundproofing and Noise Control" by Max Fuchs: A comprehensive guide to vehicle acoustics and practical solutions for noise control.
- "Car Audio For Dummies" by Doug Newcomb: While focused on car audio, this book provides useful insights into how sound deadening plays a role in audio quality.
- "The Master Handbook of Acoustics" by F. Alton Everest: For a more technical deep dive into acoustics, including principles that apply to sound deadening in vehicles.
- B-Quiet's YouTube Channel: Installation tutorials, product reviews, and customer testimonials that provide visual and practical insights into sound deadening projects.